Updating users
Let's build a nice form layout that contains a file upload and cropping components!
New Components & Routes
Let's create some new components.php artisan livewire:make pages::index # Home
php artisan livewire:make pages::users.create # Create
php artisan livewire:make pages::users.edit # Edit
Before moving forward, let's adjust some routes on web.php to make naming consistent.
Route::livewire('/', 'pages::users.index'); Route::livewire('/', 'pages::index');                          // Home
Route::livewire('/users', 'pages::users.index');               // User (list)
Route::livewire('/users/create', 'pages::users.create');       // User (create)
Route::livewire('/users/{user}/edit', 'pages::users.edit');    // User (edit)
As you can see, maryUI ships with a default app template. Make some adjustments to the menu links to add new routes and then check it in the browser.
// resources/views/layouts/app.blade.php

<x-menu-item title="Hello" icon="o-sparkles" link="/" /> <x-menu-item title="Home" icon="o-sparkles" link="/" /> <x-menu-item title="Users" icon="o-users" link="/users" />
Here, we are making use of the x-menu and x-menu-item components. They work seamless among the default sidebar shipped by maryUI.
Additionally, it keeps the correct menu item selected based on the user's current route and sub-routes, as they navigate deeply.
Form components
First, we need to create a link from our table to the new edit component. This is easier than anything with the x-table component.
Go back to users/index and make the following change:
{{-- livewire/users/index.blade.php --}}
<x-table ... link="users/{id}/edit">

{{-- You could pass any parameter based on model columns' name --}}
<x-table ... link="users/{id}/edit?name={name}&city={city.name}">
After that change you can see an empty screen when visiting the users/edit component.
However, it means that the link is working as expected, as you can see in the browser's url.
Now, in the users/edit component, add User as a component parameter.
use App\Models\User; use Mary\Traits\Toast;

new class extends Component {
    // We will use it later
    use Toast;

    // Component parameter
    public User $user;
}
Let's add an x-header in the blade section to test if the User parameter is working.
And It will work because of the Laravel route binding mechanism for models.

<div>
    //     <x-header title="Update {{ $user->name }}" separator /> </div>
Now, let's add the component properties that represent the User model properties, with their respective Livewire validation rules.
Additionally, we will include an extra property using the with() method to get all available countries.
use Livewire\Attributes\Rule; use App\Models\Country;

new class extends Component {
    use Toast;

    public User $user;

    // You could use Livewire "form object" instead.
    #[Rule('required')]     public string $name = '';

    #[Rule('required|email')]
    public string $email = '';

    // Optional
    #[Rule('sometimes')]
    public ?int $country_id = null;

    // We also need this to fill Countries combobox on upcoming form
    public function with(): array     {
        return [
            'countries' => Country::all()
        ];
    }
}
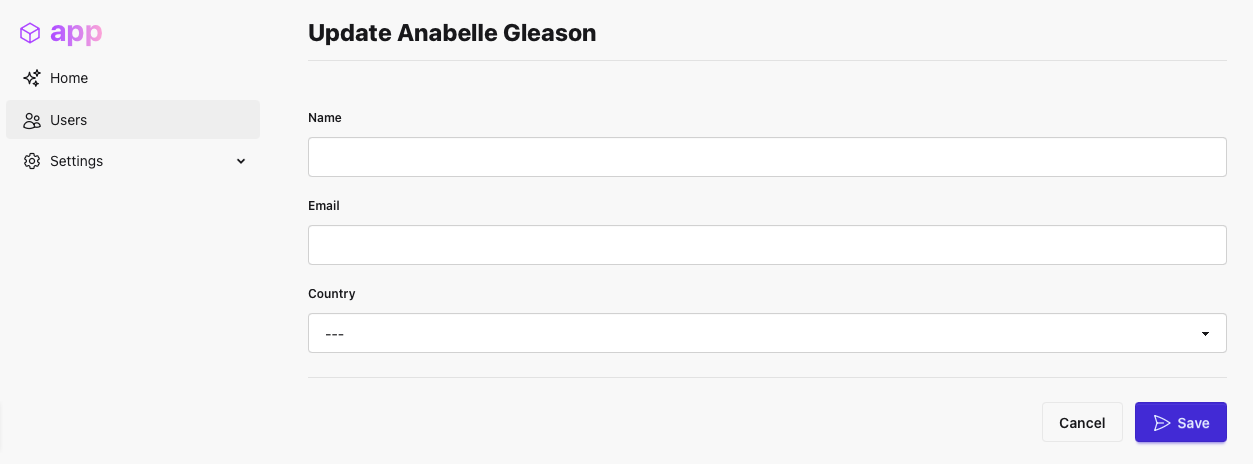
Now, move to the blade section and let's add the UI components. You will discover in the docs that most of the components have a set of available properties and slots that will make things easier for you.
<div>
    <x-header title="Update {{ $user->name }}" separator />

    <x-form wire:submit="save">         <x-input label="Name" wire:model="name" />
        <x-input label="Email" wire:model="email" />
        <x-select label="Country" wire:model="country_id" :options="$countries" placeholder="---" />

        <x-slot:actions>
            <x-button label="Cancel" link="/users" />
            {{-- The important thing here is `type="submit"` --}}
            {{-- The spinner property is nice! --}}
            <x-button label="Save" icon="o-paper-airplane" spinner="save" type="submit" class="btn-primary" />
        </x-slot:actions>
    </x-form>
</div>
Check in the browser if it is working... and if the form is not filled.
We can "fix" this by using the Livewire mount() method and its handy fill() method to fill
automatically all the component's properties that match with the target model fields.
public function mount(): void
{
    $this->fill($this->user);
}
Of course if you hit the "Save" button you get an error, because we don't have the save() method in place.
So, let's add it.
public function save(): void
{
    // Validate
    $data = $this->validate();

    // Update
    $this->user->update($data);

    // You can toast and redirect to any route
    $this->success('User updated with success.', redirectTo: '/users');
}
File component
File docs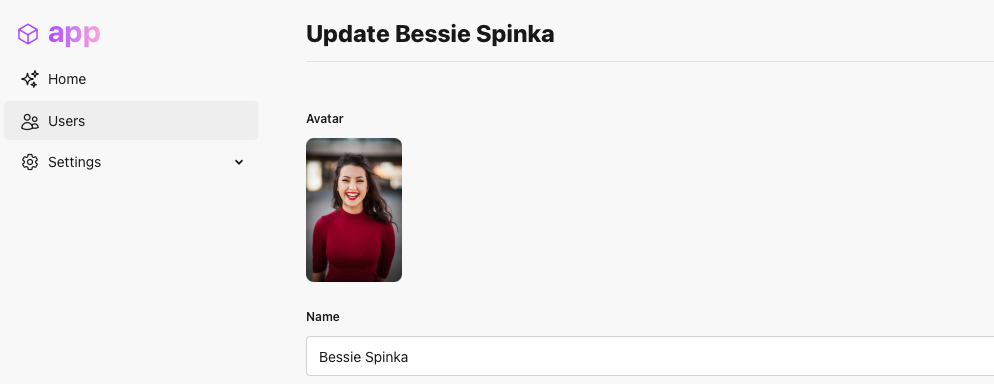
Let's make it cool and add a user avatar.
Notice we added the users.avatar column in the migration files during the Bootcamp setup.
In order to upload files with Laravel remember you need to create a storage link to make the local disk available.
php artisan storage:link
Add a new $photo property to store the temporary file upload and use the WithFileUploads
trait from Livewire itself, as described in its docs.
use Livewire\WithFileUploads;
new class extends Component {
    use Toast, WithFileUploads;
    ...

    #[Rule('nullable|image|max:1024')]     public $photo;
}
Now, let's add the cool x-file component.
In this case, we are using its default slot to display an image instead of the default browser's file input field.
<x-form wire:submit="save">
    <x-file label="Avatar" wire:model="photo" accept="image/png, image/jpeg">         <img src="{{ $user->avatar ?? '/empty-user.jpg' }}" class="h-36 rounded-lg" />
    </x-file>

    <x-input label="Name" ... />
    ...
</x-form>
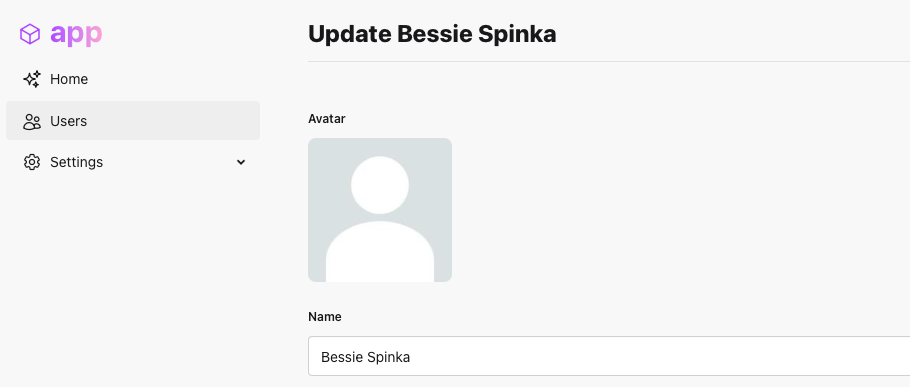
As you can see above, we display a generic image as a placeholder if the user doesn't have an avatar.
We stored it for you at your-app/public/empty-user.jpg during the Bootcamp setup.
If you select an image and hit "Save" of course the image won't be uploaded. There are certainly many ways to do it, but here is a way to get started.
public function save()
{
    $data = $this->validate();

    $this->user->update($data);

    // Upload file and save the avatar `url` on User model
    if ($this->photo) {         $url = $this->photo->store('users', 'public');
        $this->user->update(['avatar' => "/storage/$url"]);
    }

    $this->success('User updated.', redirectTo: '/users');
}
It works!
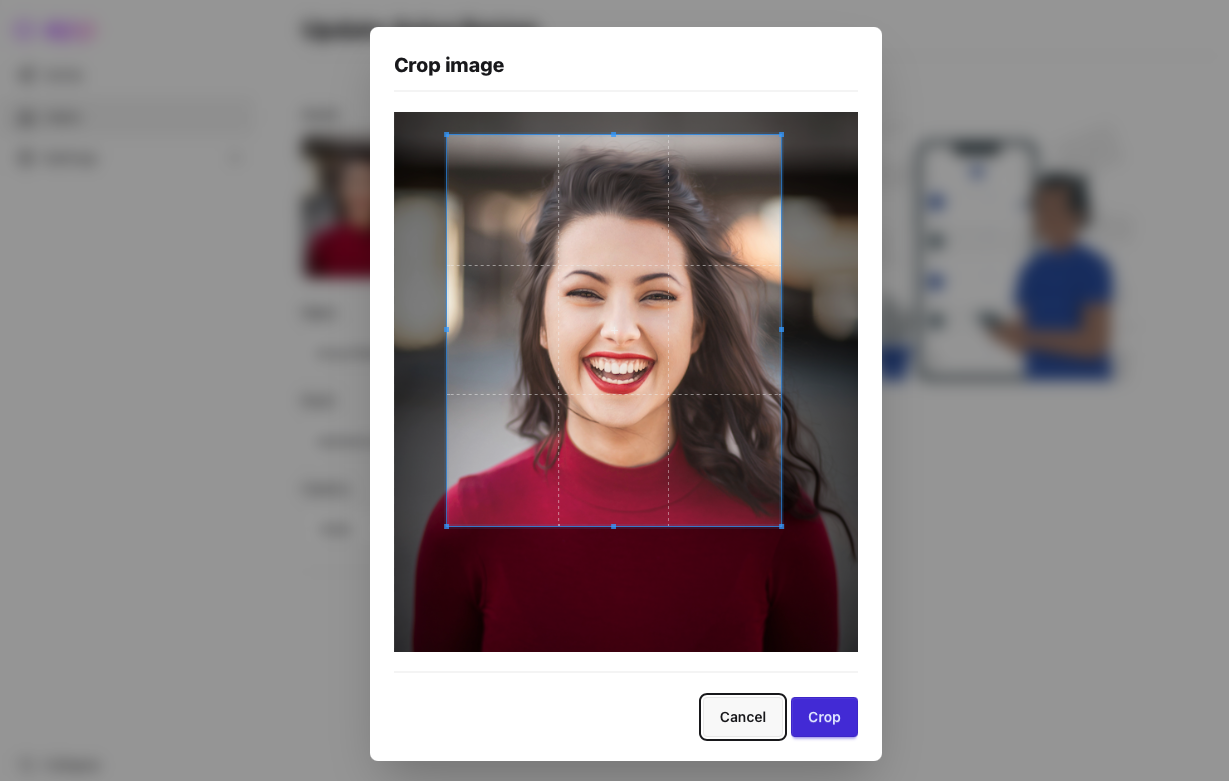
And how about cropping the avatar image?
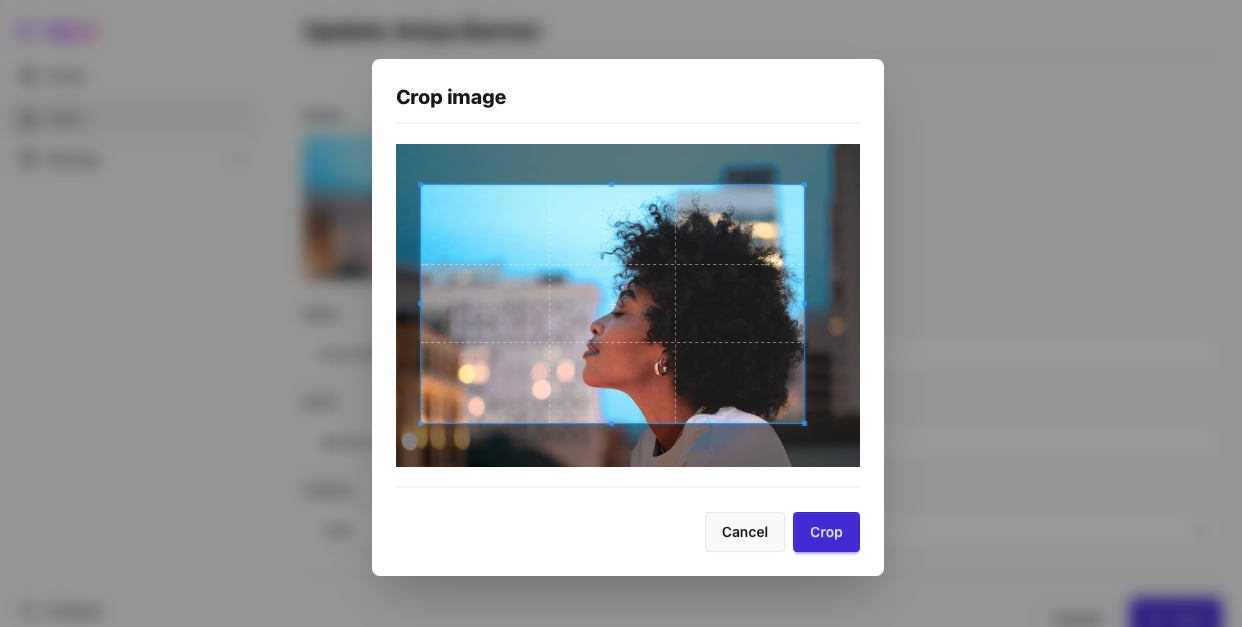
First, add Cropper.js.
{{--  /resources/views/components/layouts/app.blade.php --}}

<head>
    ...
    {{-- Cropper.js --}}
    <script src="https://cdnjs.cloudflare.com/ajax/libs/cropperjs/1.6.1/cropper.min.js"></script>
    <link rel="stylesheet" href="https://cdnjs.cloudflare.com/ajax/libs/cropperjs/1.6.1/cropper.min.css" />
</head>
Then you can use the crop-after-change property and you are done!
<x-file ... crop-after-change>
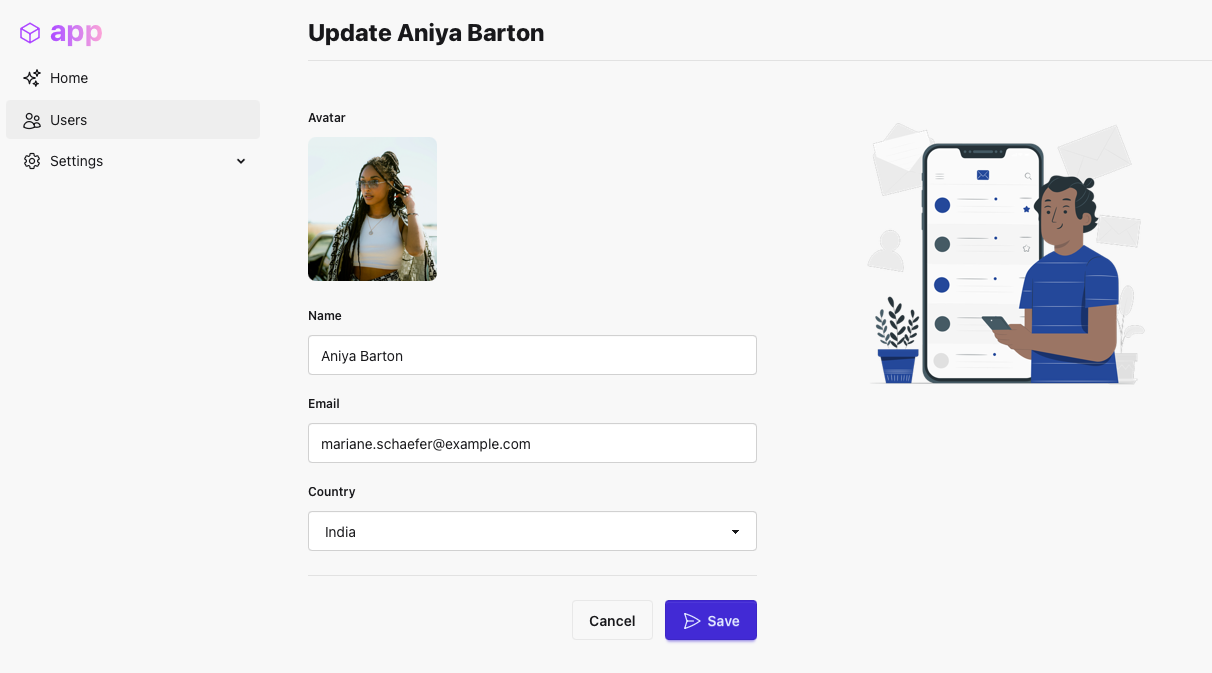
Better layout
That previous form we built looks a bit ugly because all the default components use the full width available on the screen. Here is a dirty trick we use on all maryUI demos. Just place a nice image on the right side.
<div>
    <x-header title="Update {{ $user->name }}" separator />

    <!-- Grid stuff from Tailwind -->
    <div class="grid gap-5 lg:grid-cols-2">         <div>
            <x-form wire:submit="save">
                ...
            </x-form>
        </div>          <div>
            {{-- Get a nice picture from `StorySet` web site --}}
            <img src="/edit-form.png" width="300" class="mx-auto" />
        </div>
    </div>
</div>
Choices component
Choices docs
This component is intended to be used for building complex selection interfaces for single and multiple values. It also supports a frontend or server values search.
Remember that in our data model we have a many-to-many relationship between User and
Language.
Let's adjust our component:
- Add a new property
$my_languagesto hold the selected languages. - Fill
$my_languageswith the user languages using themount()method. - Adjust the
save()method to store the multi selection. - Add an extra property
languagesto list all available languages.
use App\Models\Language; ...

new class extends Component {
    ...

    // Selected languages
    #[Rule('required')]
    public array $my_languages = [];

    ...

    public function mount(): void
    {
        $this->fill($this->user);

        // Fill the selected languages property
        $this->my_languages = $this->user->languages->pluck('id')->all();
    }

    public function save()
    {
        ...
        $this->user->update($data);

        // Sync selection
        $this->user->languages()->sync($this->my_languages);
        ...
    }


    public function with(): array
    {
        return [
        'countries' => Country::all(),
        'languages' => Language::all(), // Available Languages
        ];
    }
}
On blade section we will use the x-choices-offline component variation to easily implement a multi selection feature.
<x-select label="Country" ... />

{{-- Multi selection --}}<x-choices-offline
    label="My languages"
    wire:model="my_languages"
    :options="$languages"
    searchable />
x-choices component variation.
Rich Text Editor component
Rich Text Editor docs
This component is a wrapper around TinyMCE, and it automatically uploads images and files to local or S3 disks.
Create an account on the TinyMCE website and replace YOUR-KEY-HERE with your key in the url below.
Also remember to add your local address on the allowed domains list.
{{--  /resources/views/layouts/app.blade.php --}}

<head>
    ...
    {{-- TinyMCE --}}
    <script src="https://cdn.tiny.cloud/1/YOUR-KEY-HERE/tinymce/6/tinymce.min.js" referrerpolicy="origin"></script>
</head>
If you don't want to rely on cloud setup, just download TinyMCE SDK and self-host the source code.
{{-- Check TinyMCE dos for self-hosted version --}}
<script src="/tinymce/tinymce.min.js" referrerpolicy="origin"></script>
Add a $bio property in the component, since we added the users.bio column during the Bootcamp setup.
new class extends Component {
    ...
    // Optional
    #[Rule('sometimes')]
    public ?string $bio = null;
    ...
}
And easily add the x-editor component.
<x-choices-offline ... />
<x-editor wire:model="bio" label="Biography" hint="The great biography" /> Better layout (2)
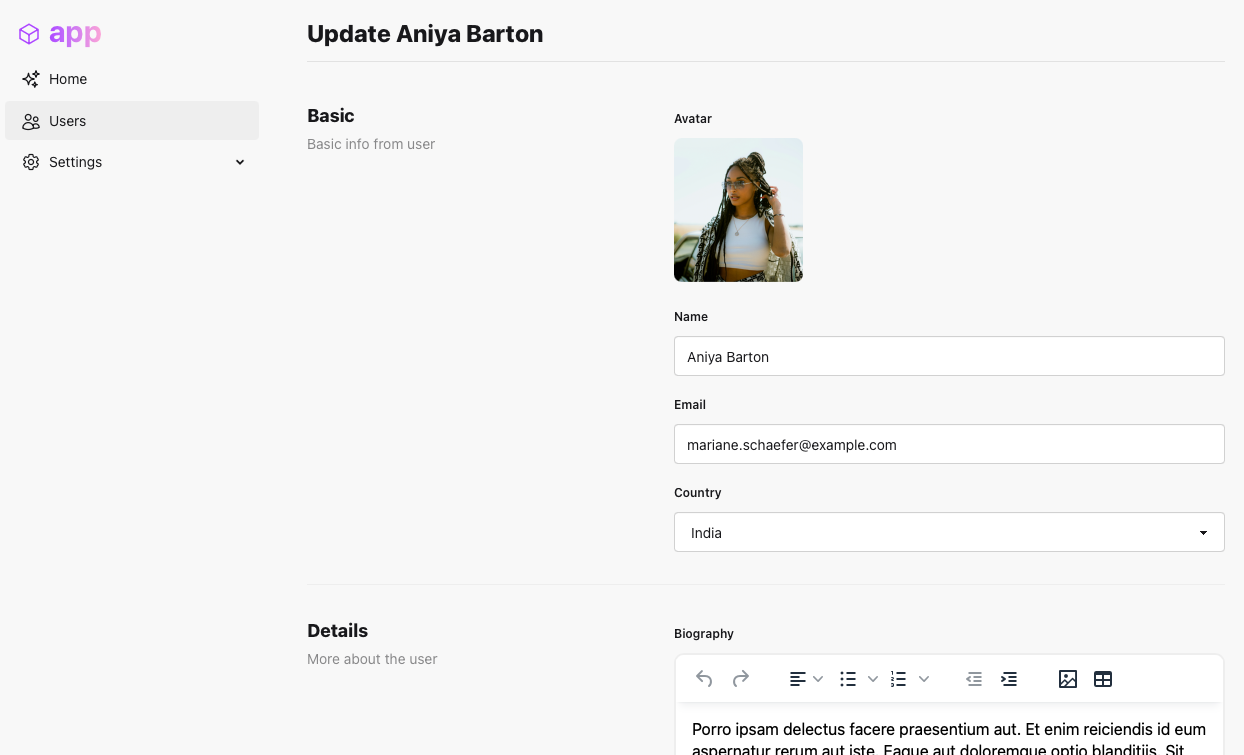
If you have a massive amount of fields, another trick is to create sections using Tailwind grid classes, like the example below, for clear group related information. This is just another alternative, so use the one that works best for you.
<div>
    <x-header title="Update {{ $user->name }}" separator />

    <x-form wire:submit="save">
        {{--  Basic section  --}}        <div class="lg:grid grid-cols-5">
            <div class="col-span-2">
                <x-header title="Basic" subtitle="Basic info from user" size="text-lg" />
            </div>
            <div class="col-span-3 grid gap-3">
                ... {{-- some fields here --}}
            </div>
        </div>

        {{--  Details section --}}
        <hr class="my-5 border-base-300" />

        <div class="lg:grid grid-cols-5">
            <div class="col-span-2">
                <x-header title="Details" subtitle="More about the user" size="text-lg" />
            </div>
            <div class="col-span-3 grid gap-3">
                ... {{-- another fields here --}}
            </div>
        </div>

        <x-slot:actions>
            ... {{-- form actions --}}
        </x-slot:actions>
    </x-form>
</div>
Display the avatar on Table component
Avatar docs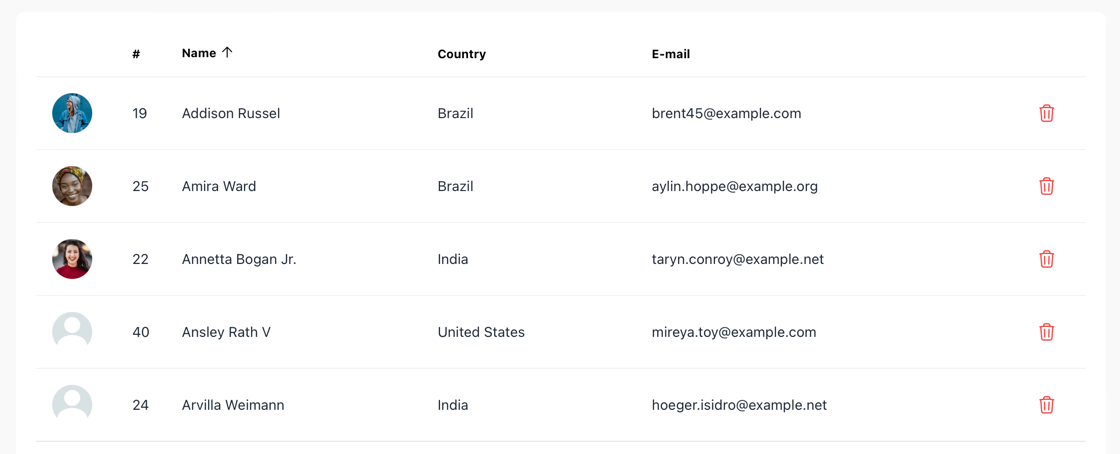
Move back to users/index and add a new column in the $headers property.
['key' => 'avatar', 'label' => '', 'class' => 'w-1'], ['key' => 'id', 'label' => '#', 'class' => 'w-1'],
Now, let's customize the table rows with the special @scope directive. You can place anything here, check Table docs for more.
<x-table ... >
    @scope('cell_avatar', $user)                                                            <x-avatar image="{{ $user->avatar ?? '/empty-user.jpg' }}" class="!w-10 !h-10" />
    @endscope
</x-table>
Challenge
We will not show you the users/create component because it is pretty much the same as users/edit, right?
Put a "create" button now and go ahead and implement it!

<x-slot:actions>
    <x-button label="Filters" ... />
    <x-button label="Create" link="/users/create" responsive icon="o-plus" class="btn-primary" />   </x-slot:actions>